Author: Jan Olbrecht

Der lange Weg zur eigenen Wallbox… eine Anleitung für WohngemeinschaftenDer lange Weg zur eigenen Wallbox… eine Anleitung für Wohngemeinschaften

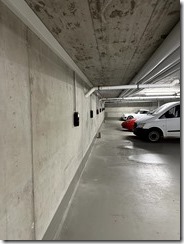
Geschafft, nach gefühlt fünf Jahren Auseinandersetzung mit dem Thema Wallbox in einer Wohngemeinschaft ist es fertig: Ich kann seit September 2023 mein Auto an meinem Stellplatz laden!

20231230_133915043_iOS

Aber damit nicht genug, das wäre ja zu einfach. Nicht nur ich kann jetzt mein Auto laden, unsere Eigentümergemeinschaft hat sämtliche 19 Stellplätze in unserer Tiefgarage ausgebaut und es wurde entweder eine Grundplatte mit Leerabdeckung oder gleich die ganze Wallbox installiert.

20230908_134707936_iOS

Ich möchte in diesem Beitrag erläutern wie ich die Eigentümergemeinschaft überzeugen konnte, welche Anforderungen technisch wie wirtschaftlich relevant waren und für welche technische Lösung wir uns am Ende entschieden haben. Ich werde auch ein wenig erzählen, wie die Installation verlief, was schief lief und was das ganze am Ende gekostet hat. Wie bei allem muss man nämlich wissen: Am Ende wird es immer etwas teurer als erwartet…

Zu allererst zu meiner Motivation: Meine Frau und ich haben 2016 unsere Wohnung mitsamt zweier Stellplätze in der Tiefgarage gekauft und bezogen. Obwohl es ein Neubau war, wurden beim Bau keine Vorkehrungen für die Installation von Wallboxen oder auch nur von Schuko-Dosen an den Stellplätzen getroffen. Mir war damals schon klar, dass dies irgendwann ein Thema sein würde und so fing ich früh an auf den jährlichen Wohnungseigentümerversammlungen das Thema zu lancieren. Mir wurde dabei folgendes klar:

  1. Ich bin der einzige, der Interesse an einer Wallbox hat.
  2. Die Hausverwaltung hat weder Erfahrung noch Interesse das Thema voranzutreiben.

Es war also klar, dass ich mich um alles werde kümmern müssen, wenn ich will, dass etwas passiert. Positiv betrachtet: Niemand wird mir reinreden wenn ich mich darum kümmere.

Mein erster Versuch das Thema zur Entscheidung zu bringen war auf der Eigentümerversammlung 2021, einem Zeitpunkt an dem es noch die KfW Förderung 440 für Wallboxen im privaten Bereich gab. Ich hatte ein technisches Konzept ausgearbeitet, das mit viel Eigenleistung bei der Installation eine Wallbox an jedem Stellplatz für etwas über 1000€ pro Platz, also etwa 200€ Zuzahlung nach Abzug der Förderung die gesamte Tiefgarage abgedeckt hätte. Es kam nicht dazu, den restlichen Eigentümern kam das Thema zu plötzlich und es wurde gebeten das Thema auf die nächste Versammlung zu verschieben. Der Hinweis, dies könnte uns die Förderung kosten war nicht ausreichend. Und genau so kam es, die Debatte wurde vertagt und zwei Wochen später war KfW440 leer und keine neuen Anträge waren mehr möglich. Der Antrag mit dem damaligen Konzept findet ihr hier.

Das Jahr 2022 brachte daher einen neuen Anlauf und eine Verfeinerung des Konzepts, aber auch eine neue Herangehensweise ans Thema:

Auf unserer Eigentümergemeinschaft stellte ich zwei Anträge:

  1. Vorbereitung aller Stellplätze für Wallboxen.
  2. Genehmigung der Installation meiner Wallboxinstallation, gesetzt den Fall der erste Antrag würde nicht angenommen.

Es hatte sich nämlich in der Zwischenzeit die Rechtslage ein wenig geändert: Es gab einen Rechtsanspruch auf Genehmigung der baulichen Veränderung im Gemeinschaftseigentum zum Zwecke des Ladens elektrisch betriebener Fahrzeuge. Ähnlich sieht es für Mieter aus, diese haben das Bürgerliche Gesetzbuch §554 auf ihrer Seite. In der Praxis bedeutet dies, dass die Eigentümergemeinschaft die Errichtung einer Wallbox selbst nicht verhindern kann, wohl aber die Art der Errichtung bestimmen darf.

In Vorbereitung auf diesen Termin hatte ich meine technische Lösung für die Installation verändert und Angebote mehrerer Elektriker eingeholt, die Hausverwaltung hatte ohne mein Wissen selbst auch Angebote (vermutlich aus anderen Häusern) vorliegen. Mein Ziel war die Vorbereitung aller Stellplätze und Installation von Wallboxen zumindest auf meinem.

Als Argumente für mein Anliegen hatte ich folgendes überlegt:

  • Wertsteigerung und Zukunftssicherheit der Immobilie
  • Geringe Kosten für den einzelnen, wenn alle mitmachen (dazu später mehr…)
  • Auswahl eines Systems, das über Lastmangement sicherstellen kann, dass nicht die Haussicherung durchbrennt und jemand im Aufzug steckenbleibt.
  • Ruhe von mir in Bezug auf das Thema…

Mir war klar, dass eine überwältigende Mehrheit auf der Versammlung für meinen Antrag stimmen musste, damit auch die Eigentümer von Stellplätzen, die kein Interesse daran hatten, gezwungen wurden die Installation mitzutragen und mitzuzahlen. Selbst wenn der Antrag der gemeinschaftlichen Installation nicht zustande gekommen wäre, war klar, dass die WEG über die Art der Installation entscheiden musste, denn ich wollte meine eigene Wallbox, mein Elektroauto war nämlich bereits bestellt und kurz vor Auslieferung.

Als Vorbereitung war ich sogar so weit gegangen und hatte mir eine easee Charge sowie eine easee Ready Platte bereits gekauft und konnte diese in der Eigentümerversammlung als Anschauungsobjekte zeigen und daran die Funktion erklären. Diese wurden nicht im Haus weiter verbaut (die kommen in die Garage meiner Mieter, ich besitze noch eine vermietete Immobilie), zeigten aber klar meinen Willen das ganze auch so durchzuziehen.

Am Ende war es einfacher als erwartet, mein Antrag wurde einstimmig durch die Eigentümer angenommen, insofern gab es keine Probleme mit qualifizierten Mehrheiten. Es konnte beginnen!

… nur was eigentlich?

Die Wallboxinstallation in unserer Hausgemeinschaft musste mehrere Anforderungen berücksichtigen:

  1. Lokale Autorisation der Wallbox (Stromdiebstahl und so Bedenken)
  2. Statisches Lastmanagement mehrerer Wallboxen (bis zu 19)
  3. Option auf Dynamisches Lastmanagement
  4. Optimierung der Verkabelungskosten aufgrund langer Wege
  5. Verbrauchserfassung, idealerweise mit Abrechnungssystem bzw. Übersicht

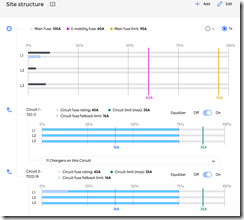
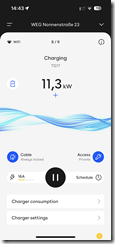
Die Wahl fiel bei uns auf die easee Charge. Diese tickte für uns alle Boxen. Sie ist per RFID Chip und App bedienbar, erfasst selbst den Verbrauch, kommt mit Lastmanagement für bis zu 101 Wallboxen, unterstützt optional auch Dynamisches Lastmanagement mit dem easee Equalizer und vor allem: Es gibt sie auch in leer als easee Ready, also der reinen Montageplatte mit Blindabdeckung.20230911_142502471_iOS
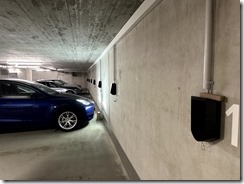
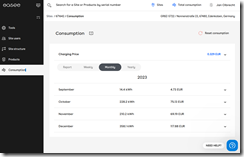
Wir nutzen die easee Cloud als Abrechnungssystem und haben (aktuell) die Wallboxen am Allgemeinstromzähler des Hauses angeschlossen. Die Kosten werden über die Hausabrechnung und den Nebenkostenabschlag verrechnet, allen ist klar, dass die Zähler der Wallbox nur +-3% genau sind.

easee_cloud

Jede Box dediziert mit dem Zähler der zugehörigen Wohnung zu verbinden wäre mit erheblichen Mehrkosten verbunden gewesen, da wir je nach Stellplatz 70 oder mehr Meter Kabelweg gehabt hätten und Leitungen aus zwei Häusern zur gemeinsamen Tiefgarage hätten gelegt werden müssen. Von dem was ich gelernt habe, sind MID-Zertifizierte Zähler aber auch nicht genauer und eine MID-zertifizierte Variante der easee Charge soll wohl noch 2024 auf den Markt kommen.

Um das Lastmanagement, die Verwaltung und den Fernzugriff sicherzustellen wird die bei der easee Charge mitgelieferte LTE Verbindung nicht genutzt sondern wir haben einen WLAN Zugang in der Tiefgarage und am Hausanschlussraum bereitgestellt, über den die Wallboxen untereinander und mit dem Equalizer für das Lastmanagement kommunizieren können. In unserem Fall ist es so, dass ich bereits ein etwas überdimensioniertes Heimnetzwerk auf Basis Ubiquiti Unifi im Betrieb habe und aus Eigeninteresse mir eine WLAN-Brücke in den Keller gebaut hatte. Das Equipment war insofern schon vorhanden und wurde der Hausgemeinschaft von mir kostenfrei überlassen. Einzig ein Netzwerkkabel wurde noch zusätzlich vom Zählerraum bis in die Tiefgarage zusammen mit den Stromkabeln gelegt, um dort noch einen weiteren WLAN Access Point zu positionieren. Die Wallboxen nutzen also einfach meinen Internetanschluss mit, sollte ich jemals ausziehen muss die Hausgemeinschaft entweder einen Mini-Internetanschluss für den Keller beauftragen oder ein anderer Hausbewohner führt das weiter.

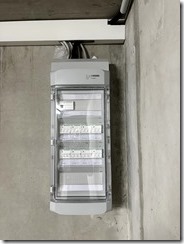
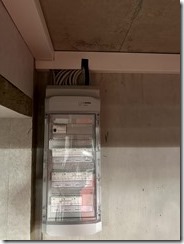
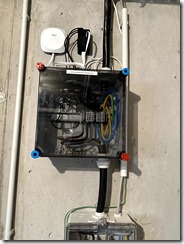
Geplant war, alle Wallboxen entlang der zwei Wände in Reihe zu verkabeln um die Kosten minimal zu halten. Hier kam dann leider auch der Ärger ins Projekt, denn die Umsetzung durch den Elektriker hatte plötzlich anstelle der vereinbarten und im Angebot enthaltenen zwei langen Strippen mit Abgriffen über jeder Wallbox plötzlich zwei Unterverteilungen in der Garage. Kurz und knapp: Das war nicht Abgesprochen und die Mehrkosten hätten wir auch niemals bezahlt, wäre da nicht die Fuck-up-Fee in Gestalt der Urlaubsvertretung der Hausverwaltung vorbeigekommen, die die Rechnung ungeprüft einfach beglichen hat…

20231230_102957117_iOS20231230_133814238_iOS

So haben wir jetzt eben Unterverteilungen und eine Menge unnötig langer Anschlusskabel zu den Wallboxen in der Garage, können dafür aber die Werkzeugfrei und elektrisch sicher aus ihrer Halterung entfernbaren Wallboxen auch über einen eigenen Sicherungsautomaten abschalten.

Das eingebaute Lastmanagement der Wallboxen ist ein statisches Lastmanagement, d.h. die Wallboxen können einen fest zugewiesenen Wert an Stromverbrauch untereinander aufteilen und so reihum die Elektroautos laden. Um Debatten mit dem Netzbetreiber zu vermeiden und da ich sowieso nur der einzige Nutzer war, hatten wir die Anlage mit 11kW (also einer einzigen Wallbox) angemeldet, was nicht genehmigungspflichtig war.

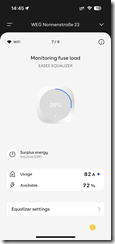
Im Laufe des Jahres kam allerdings ein neues Produkt von easee auf den Markt: Das Equalizer + Amp Bundle. Eine Kombination aus dem Lastmanagement (Equalizer) und einem kleinen Wandlerzähler mit CT-Klemmen, die nur um die Zuleitung im ungezählten Bereich gelegt werden müssen und bis zu 100A messen können. Das ganze für einen schlanken Betrag (zumindest verglichen mit allem was sich Wandlerzähler nennt und von den üblichen Verdächtigen wie Hager, Schneider Elektrik, etc. kommt. Das wollte ich haben, denn damit wurde aus dem statischen Lastmanagement ein dynamisches Lastmanagement:

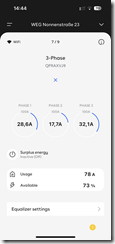
Wo bisher ein fester Wert von 16A (entspricht 11kW Ladeleistung) für alle Wallboxen eingetragen ist, setzt der Equalizer anhand der Echtzeitmessung am Hausanschluss den maximal zur Verfügung stehenden Leistungswert und berücksichtigt dabei eben auch alle anderen Verbraucher im Haus. So könnten wir (in der Theorie) mit bis zu 6 Wallboxen gleichzeitig bei voller Leistung laden wenn gerade keine andere Last im Haus läuft. In der Praxis sind wir aktuell auf unter 60A limitiert, da dies das Limit des Stromzählers ist, den wir im Einsatz haben. Bei Installationen mit bis zu 20 Stellplätzen reichen 22 kW allerdings nach allen Erfahrungswerten aus um über den Tag alle Autos zu laden, denn es ist einfach unrealistisch dass jeder Freitag Abends mit leerem Akku nach Hause kommt und am nächsten Morgen nach Südfrankreich in den Urlaub losfahren will…

Aber… so könnten wir selbst das hinbekommen. Und weil ich das geil fand, habe ich das einfach gekauft, im vollen Bewusstsein das ist mein “Privatspaß” und ich schenke das der Eigentümergemeinschaft.

easee_load_balancing

Die Installation des Lastmangements selbst war leider selbst ein Abenteuer, mein Bauchgefühlt sagt mit nämlich, dass wir die allererste (oder eine der ganz frühen) Wohnanlage im Netzgebiet der Pfalzwerke Netz sind, die eine so große Installation mit Dynamischem Lastmangement installiert hat. Es hat einiges an Geduld und etwas zivilen Ungehorsam meinerseits benötigt um irgendwann einen Ansprechpartner beim Netzbetreiber zu finden, der mir die Installation der Wandlerklemmen im ungezählten Bereich freigeben konnte… indem der Netzbetreiber seine TAB (Teilnehmeranschlussbedingungen, quasi das technische Hilfsblatt nach dem Elektrikerbetriebe wissen was sie am Hausanschluss dürfen oder nicht) aktualisierte. War ja nicht so, dass der VDE zu diesem Thema nicht schon eine Empfehlung gehabt hätte, diese war nur noch nicht bei den Pfalzwerken übernommen worden und somit den Elektrikerbetrieben mit denen ich gesprochen hatte auch unbekannt.

Letztendlich konnte das Lastmanagement dann aber doch verbaut werden, wurde auch vom Netzbetreiber anschließend direkt plombiert und uns wurde mit diesem Lastmanagement die volle Leistung der Haussicherung von 100A als Dauerlast genehmigt.

20231211_125408054_iOS20231230_134358000_iOS20231230_134505000_iOS20231230_134412000_iOS

Fürs erste sind wir damit also durch, die Installation ist fertig, alles funktioniert, die Rechnung ist bezahlt und es wird keinen Rechtsstreit mehr deswegen geben. Irgendwann in ferner Zukunft wenn tatsächlich noch ein paar mehr Hausbewohner elektrisch unterwegs sind, werden wir die Installation auf einen eigenen Zähler umstellen und dem Netzbetreiber die Drosselung oder Fernabschaltung der Wallboxen ermöglichen. Damit können wir dann nämlich einen Ladestromtarif bekommen bei dem aufgrund dieser netzdienlichen Steuerbarkeit die Netzgebühren um ca. 5ct/kWh niedriger ausfallen… dann lohnt es sich nämlich.

Aber genug gewartet, hier kommen die Zahlen:

Die gesamte Installation kommt auf Kosten von 25.398,52€ für 19 Stellplätze (5 mit Wallbox, 14 nur mit Vorbereitung). Da das Netzwerk und das Lastmanagement von mir angeschafft und bezahlt wurden, waren die Kosten der WEG geringer:

  • 985,09€ pro Stellplatz (nur Vorbereitung)
  • 1.968,03€ pro Stellplatz (mit Wallbox)
    Weil es relevant ist für Eigentümer die selbst ihre Immobilie bewohnen: Von diesen Beträgen sind 441,57€ als Handwerkerleistungen steuerlich absetzbar.

Hätte es die Abweichung von Angebot und Umsetzung (… Unterverteilung) nicht gegeben, wären die Kosten um etwa 200€ pro Stellplatz niedriger ausgefallen.

Ich selbst habe am Ende 5.307,46€ sowie etwa 100 Stunden in dieses Projekt gesteckt.

Die detaillierte Kostenaufstellung mit *allen* Einzelpositionen findet sich hier.
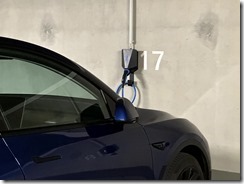
20231230_134317061_iOS

Case of the missing Outlook SSOCase of the missing Outlook SSO

If you’re in IT you certainly know this scenario: There’s something in your environment you just can’t get to work the way you want, you’ve spent countless hours reading documentation, googled community forums and fiddled endlessly with settings in order to make it work. It’s not a showstopper and there is a workaround or even just a single prompt that only shows up every once in a while so you can’t justify powering through the issue until it is done, but you return to it every so often. Then it happens, you’re on a completely unrelated thing and reading through docs or configuring settings and then you stumble upon it, a small textbox that explains your issue and how to fix it.

This just happened to me. I’ve been trying to get SSO (Single Sign On) to work for our corporate PCs but haven’t had any luck whatsoever in years of trying. No matter what I did, we always still got prompted to enter credentials for Outlook and Skype for Business. Today I learned why:

Like many organizations, we’re using Office 365. We also use AzureAD Connect to sync our on-premises Active Directory to the Microsoft Cloud and have set it to enable SSO for our users – which works really well for everything but Outlook. The issue of logging in to Skype for Business went away when we migrated to the newer Teams client but Outlook remained a thorn in my side – one I just couldn’t get myself to figure out.
Lately, we have been trying to roll out Microsoft’s Security Defaults for our AzureAD environment and activating Multi-Factor Authentication (MFA) for all our users. The issue I ran into here was that when I enabled the AzureAD Security Defaults, none of my users were able to log in to Outlook on their PCs anymore. Searching through docs for this put me on the right track: For some reason, our Outlook installs were using Legacy Authentication. Some Google-Fu put me on to registry keys I was supposed to add to Enable modern authentication in Outlook – to no avail.
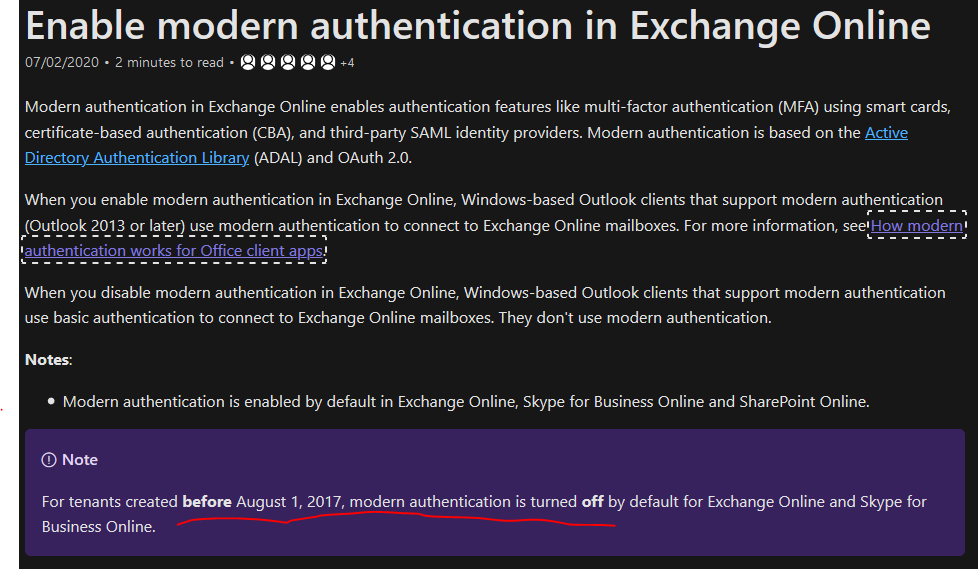
Careful reading of the docs however put me on to the source of my pain:

As we’ve been using Office 365 for a long time, this was us! Mind you, all documentation available on the web is (of course…) written agains the current defaults, which have modern authentication turned on.
Quickly jumping into Powershell solves this:

$UserCredential = Get-Credential
$Session = New-PSSession -ConfigurationName Microsoft.Exchange -ConnectionUri https://outlook.office365.com/powershell-liveid/ -Credential $UserCredential -Authentication Basic -AllowRedirection
Import-PSSession $Session -DisableNameChecking

Set-OrganizationConfig -OAuth2ClientProfileEnabled $true

Remove-PSSession $Session

That’s it. Once I set this, Single Sign On to Outlook just worked. MFA just worked. And I have one less thing on the to-do list that I’ve been visiting over and over for years.

-Jan

Home Assistant Remote Access networkingHome Assistant Remote Access networking

I’ve written this guide for the documentation pages of the Home Assistant iOS companion app. As I’m rather proud of them I’m republishing the guide here. Jan

Companion app networking

Having your Home available anywhere and everywhere you go is important, whether you forgot to turn off the stove or you want to check the camera views because of an alert.

Because we want your smart home to be private and secure on the web, many parts of the puzzle need to align just right so everything works as you expect. This guide aims to help you understand the requirements, some of the complexities and our recommended typical solutions to setting up network access to your Home Assistant instance:

The basics: How the app talks to your Home Assistant

In order for the app to talk to HA, it needs to know its address. Just within your home network you might know that your Home Assistant is on an IP like 192.168.1.4 and listening on port 8123. If you use Hass.io and haven’t changed any of the defaults, Home Assistant will also be reachable at http://hassio.local:8123.
This is all fine and will work perfectly well as long as you never take your phone or tablet outside your home, but what if you do?
The easiest way is to subscribe to Nabu Casa Cloud for the small monthly fee of $5 US, which will solve all this for you and you can (almost) stop reading here, as well as supporting further development of Home Assistant. Nabu Casa Cloud acts as a “smart” proxy on the internet, tunnelling your frontend in an encrypted manner from your home to your phone, regardless where you are and without requiring opening your home network to inbound traffic from the internet.
If you don’t want to use Nabu Casa Cloud (which is fine, but you should still subscribe and enjoy the warm feeling of supporting Home Assistant), you need HA to be accessible from the internet. This requires opening a port on your router and getting a name for your Home Assistant on the internet. While it is possible to have your HA use Port 8123 internally and have your router do a port-forwarding from say the default https port of 443 to 8123, we recommend you NOT do this for reasons of simplicity which we will explain later. You also need a name for your Home Assistant as hassio.local is a private domain suffix that does not exist on the internet.

Dynamic DNS

Most non-business internet connections have at least one of two drawbacks: Your internet service provider typically does not give you a static IP (meaning the public IP address your modem/router is assigned will change every once in a while or even every 24 hours) and some ISPs don’t even give you a “real” IP address as they do not have enough addresses to give out. This last scenario is very common on cable providers and especially in Asia/Pacific. If your ISP says they use Carrier-grade NAT (CG-NAT) or something like Dual Stack lite (DS-lite) you likely will have this problem. If you’re impacted please see the CG-NAT and IPv6 addendum.
For dynamic, public IP addresses the solution is simple: Typically users choose a dynamic dns service such as duckdns.org which will create a unique name (e.g. my-home.duckdns.org) that is supported to be updated via your router to always point to your public address. If you have created the port-forward of TCP 8123 on your router’s public interface to TCP 8123 on your internal Home Assistant IP (say 192.168.1.4), your Home Assistant is now available on the web. You could declare victory at this point and stop but don’t – because everything at this point is unencrypted and we want you to enjoy HA in a private, secure manner.

Hairpin NAT

At this point of setting up we need to check one capability of your router: Hairpin NAT (otherwise known as NAT reflection or NAT loopback). What this means is the ability of your router to mirror a request from its inside (LAN) interface to its outside (WAN) address back to an internal IP address (in this case, your Home Assistant), thus reflecting or hairpinning the traffic. It’s easy to check if this works: Just open a browser on your phone or PC while connected to your home network and opening http://my-home.duckdns.org:8123 – if it works, you have hairpin NAT working and can go on to the next section. Most current routers will support NAT hairpinning out of the box, there are however some routers (especially if you got your router from your ISP) that do not have this ability or have it disabled. If this is the case, you need to check if you can enable it on your router or, if you can’t, you will need to set up Split Brain DNS.

Securing the connection

We’ll stay with our DuckDNS example. Using http://my-home.duckdns.org:8123 works, but anyone could be reading your traffic. Let’s change that! The DuckDNS Hass.io add-on will create a free, trusted and valid LetsEncrypt SSL certificate to use on your Home Assistant. Just follow the installation instructions here and here and you will have secure, public access to your Home Assistant. What’s great about using the DuckDNS add-on is that it uses the LetsEncrypt DNS challenge, whereby during requesting the certificate it proves “ownership” of the domain by creating a temporary DNS record. If you use a different DNS provider other than DuckDNS, you can use the LetsEncrypt add-on for Hass.io which supports proving ownership of the name either via the DNS or the http challenge. The latter requires port-forwarding TCP Port 80 on your router to your internal Home Assistant IP on TCP Port 80.

With Hairpin NAT working and SSL on your DNS domain you can now access Home Assistant securely both on the internet and at home and you should add base_url: my-home.duckdns.org:8123 to the http: section of your configuration.yaml. This is not strictly necessary but will help with auto-detection during onboarding of the iOS app, as the app will know where and how to reach your Home Assistant.

Split Brain DNS

So what’s this split brain DNS (also known as split horizon DNS, split-DNS) thing and why would I need it? If your router doesn’t do hairpin NAT, you still need to access your Home Assistant via the public DNS name, e.g. my-home.duckdns.org. Why is that? Because valid encryption via https and SSL certificates only works for public DNS names. What this means is that the certificate name on your server needs to match the DNS name you enter in your browser or app. This is fine with hairpin NAT available but becomes an issue when it’s not. In this case you need to “split” the answer your browser/app gets when it looks up the IP address behind my-home.duckdns.org – you need one answer for devices on your home network that points to the internal IP address of your Home Assistant (e.g. 192.168.1.4) and another answer for when you’re out and about [e.g. 104.25.25.31.
The easiest solution to this is to use the Hass.io add-on AdGuard Home. This can also be set up on some routers (e.g. pfSense or UniFi Security Gateways) but we’ll continue on using our example guide with the tools provided via Hass.io: So you’ve now installed the AdGuard Home add-on and changed the DNS server on your router DHCP settings to the address of your Home Assistant. You should now go to the AdGuard Home setting page in your Hass.io panel and there go to Settings -> DNS settings, then scroll down to the bottom where you have a box titled: DNS rewrites
Here you click Add DNS rewrite and enter your my-home.duckdns.org and the internal IP 192.168.1.4 of your Home Assistant, followed by clicking on save. What happens now is that all DNS queries for the address my-home.duckdns.org from inside your home network will be answered by AdGuard via its own rewrite table, thus pointing toward the internal address of your Home Assistant instead of asking public DNS servers on the web which will all answer with the public IP of your router.
Even if you don’t need split brain DNS, you may also want to set this up as it will enable you to access Home Assistant via it’s public name even when your internet connection is down and hairpin NAT won’t work. One less dependency on the Cloud!

Setting up the iOS app

If you’ve followed all our advice, your app should find your Home Assistant instance automatically during onboarding when connected to your home wifi network. You can also go through onboarding anywhere you’re connected to the internet by manually entering https://my-home.duckdns.org:8123 and the setup will finish with that address in the External URL field in the app connection settings. There should be no need to enter an internal URL as the same address will work regardless of where your phone is connected.
If you want to (or have to) use Nabu Casa Cloud, there are two more steps required:
– In iOS settings, set location access permissoin for Home Assistant to Always. This is required because starting with iOS 13, Apple will only let apps with such permission have access to the wifi SSID which is used by the app to determine whether to use internal or external URLs.
– Once permission is given, add your Home Assistant address to internal URL (if you come from the top of this article, this could be http://hassio.local:8123
– If you’ve set up Nabu Casa Cloud in your Home Assistant the checkbox to “Connect via Cloud” should now become available. Once you activate the checkbox, external URL will become deactivated.

Addendum: CG-NAT

If your ISP doesn’t give you a public IPv4 address you’re down to basically only two solutions: You can call your ISP and ask if they can give you a real address or if there is an upgrade for your connection available (oddly enough, asking nicely will work with many ISPs out there) or use Nabu Casa Cloud.

Addendum: IPv6

Since IPv6 has been rolling out for the last 20 years, chances are that along with an IPv4 address your home network will also have been provided with IPv6 addresses from your ISP. So your Home Assistant host may have it’s IPv4 address of 192.168.1.4 as well as an IPv6 address of e897:5571:5f66:21dc:51c1:28d8:3bdc:6724. Here’s where our advice for not changing the TCP port you forward to Home Assistant comes in:
– Home Assistant will listen for traffic on 192.168.1.4:8123 and [e897:5571:5f66:21dc:51c1:28d8:3bdc:6724]:8123
– If you really want to future proof your setup, you will have two DNS records for my-home.duckdns.org: An A-record pointing to your routers public IPv4 address which will be port-forwarded to your HA hosts internal address and an AAAA-record, which points directly to the IPv6 address of your HA host. Now when you access your HA remotely either protocol could be used, since all you’re entering will be https://my-home.duckdns.org:8123. If you had changed the Port on your Router to the https default 443, the connection would now fail if you suddenly ended up with a working IPv6 setup as nothing is listening on [e897:5571:5f66:21dc:51c1:28d8:3bdc:6724]:443.

Addendum: Reverse Proxy via NGINX

There are cases when having Home Assistant serve https is impossible or incompatible with some of your devices. This can be especially true with ESP-based low power IoT hardware that communicates via RestAPI and just doesn’t have the horsepower to do the SSL encryption. One example is the konnected.io Integration which requires Home Assistant to be reachable via http.
So to accomodate this and still have encryption for external access, we use a reverse proxy like NGINX. What a reverse proxy does is to act as an intermediate for your clients (Browser or App). The client talks to the reverse proxy securely via https and the proxy passes through this traffic to Home Assistant over an unencrypted http connection. Staying with our Hass.io example, we’ll assume you have already set up DuckDNS and LetsEncrypt. You should now install the Hass.io add-on NGINX Home Assistant SSL proxy and configure it according to the docs.

In your configuration.yaml file the following changes are needed:

http:
  use_x_forwarded_for: true     # To ensure HA understands that client requests come via reverse proxy
  trusted_proxies:
    - 172.30.32.0/23            # In Hass.io we need to add the Docker subnet
    - 127.0.0.1                 # Add the localhost IPv4 address
    - ::1                       # Add the localhost IPv6 address
  base_url: my-home.duckdns.org # Note we no longer have a :8123 Port here
  # Uncomment or remove the SSL certificate lines:
  # ssl_certificate: /ssl/fullchaim.pem
  # ssl_key: /ssl/privkey.pem

Once that’s done your router’s port-forwarding should be TCP 443 to your Home Assistant internal IP 192.168.1.4 Port 443. Do NOT create a forward to 192.168.1.4 Port 8123 as that is now unencrypted http and should only be accessible from your local network.
You can now access your Home Assistant via https://my-home.duckdns.org both internally and externally while having http://192.168.1.4:8123 available to be used as unencrypted endpoint for things like konnected.io.
Note: If you don’t use the NGINX Hass.io add-on but instead roll your own, please ensure that websockets support is enabled.

Fixing Windows Admin Center ‘Can’t verify whether “cluster_name” is online’Fixing Windows Admin Center ‘Can’t verify whether “cluster_name” is online’

So you’re trying to add your Hyper-Converged Cluster to Windows Admin Center and it’s giving you the “Can’t verify whether “cluster_name” is online” treatment. You’ve checked DNS, upgraded WAC/Honolulu and tested installing it on multiple servers and workstations. Nothing helped. I have good news! for you:

I ran into this immediately after Project Honolulu became public and have been banging my head continuously. Here’s what to do:

Check the Event Viewer\Applications and Services Logs\Microsoft-ServerMangementExperience for the following entry:

400 - CimException: The xsi:type attribute (p1:MSCluster_Property_Node_PrivateProperties) does not identify an existing class.

This indicates your that WAC is connecting fine to your cluster but is running into an issue where it’s missing some cluster property.

I’ll have to give props to Robert Hochmayr here as he pointed me to the solution:

There are two private properties that are set on the cluster and its nodes which through some combination of events (like adding nodes to the cluster at a later point in time) are missing from nodes. You can find out by running the following PowerShell command on one of your S2D cluster nodes:

get-clusternode | Get-ClusterParameter

The output will look something like this:

Object Name Value Type
------ ---- ----- ----
S2D-01 S2DCacheBehavior 88 UInt64
S2D-01 S2DCacheDesiredState 2 UInt32
S2D-03 S2DCacheDesiredState 2 UInt32
S2D-03 S2DCacheBehavior 88 UInt64

Note that this was a four node cluster.. Nodes S2D-02 and S2D-04 are missing!

Off to the registry to fix it:

At HKLM\Cluster\Nodes\x\Parameters there should be two entries for the above cluster parameters. On my systems, the full registry key Parameters was missing from nodes 1 and 4 (go figure…). I added them *on each host* by running the following command lines:

REG ADD HKEY_LOCAL_MACHINE\Cluster\Nodes\1\Parameters /f /v  "S2DCacheBehavior" /t REG_QWORD /d "88"
REG ADD HKEY_LOCAL_MACHINE\Cluster\Nodes\1\Parameters /f /v "S2DCacheDesiredState" /t REG_DWORD /d "2"
REG ADD HKEY_LOCAL_MACHINE\Cluster\Nodes\4\Parameters /f /v  "S2DCacheBehavior" /t REG_QWORD /d "88"
REG ADD HKEY_LOCAL_MACHINE\Cluster\Nodes\4\Parameters /f /v "S2DCacheDesiredState" /t REG_DWORD /d "2"

Checking I now get the correct PowerShell output:

get-clusternode | Get-ClusterParameter

Object Name Value Type
------ ---- ----- ----
S2D-01 S2DCacheBehavior 88 UInt64
S2D-01 S2DCacheDesiredState 2 UInt32
S2D-02 S2DCacheBehavior 88 UInt64
S2D-02 S2DCacheDesiredState 2 UInt32
S2D-03 S2DCacheBehavior 88 UInt64
S2D-03 S2DCacheDesiredState 2 UInt32
S2D-04 S2DCacheBehavior 88 UInt64
S2D-04 S2DCacheDesiredState 2 UInt32

Once this was added I was immediately able to add the cluster to Windows Admin Center. No reboots or service restarts were needed.

-Jan

Issues preparing for upgrade to SCVMM 1801Issues preparing for upgrade to SCVMM 1801

I just ran into a small hickup upgrading my System Center Virtual Machine Manger 2016 to the new version 1801. I wasn’t able to find any documented cases of anyone running into this so here we go:

The upgrade to SCVMM 1801 actually requires uninstalling SCVMM 2016. This failed on my installation just at the point where I was clicking on the “Remove features” button in the setup dialog.

In C:\ProgramData\VMMLogs\SetupWizard.log I found the following entry:

11:52:28:Uncaught Exception: Threw Exception.Type: Microsoft.VirtualManager.Utils.CarmineException, Exception.Message: Unable to detect cluster configuration of the node.
Ensure that the user has permissions to detect cluster node configuration.
11:52:28:StackTrace: at Microsoft.VirtualManager.Setup.ClusterServiceHelper.get_IsAClusterNode()
 at Microsoft.VirtualManager.Setup.AddRemoveComponentsPage.EnterPage()
 at Microsoft.VirtualManager.SetupFramework.PageNavigation.WaitEnterSet(Page page)
 at Microsoft.VirtualManager.Setup.AddRemovePage.RemoveComponent_Click(Object sender, RoutedEventArgs e)
 at System.Windows.EventRoute.InvokeHandlersImpl(Object source, RoutedEventArgs args, Boolean reRaised)
 at System.Windows.UIElement.RaiseEventImpl(DependencyObject sender, RoutedEventArgs args)
 at System.Windows.Controls.Primitives.ButtonBase.OnClick()
 at System.Windows.Controls.Button.OnClick()
 at System.Windows.Controls.Primitives.ButtonBase.OnMouseLeftButtonUp(MouseButtonEventArgs e)
 at System.Windows.RoutedEventArgs.InvokeHandler(Delegate handler, Object target)
 at System.Windows.RoutedEventHandlerInfo.InvokeHandler(Object target, RoutedEventArgs routedEventArgs)
 at System.Windows.EventRoute.InvokeHandlersImpl(Object source, RoutedEventArgs args, Boolean reRaised)
 at System.Windows.UIElement.ReRaiseEventAs(DependencyObject sender, RoutedEventArgs args, RoutedEvent newEvent)
 at System.Windows.UIElement.OnMouseUpThunk(Object sender, MouseButtonEventArgs e)
 at System.Windows.RoutedEventArgs.InvokeHandler(Delegate handler, Object target)
 at System.Windows.RoutedEventHandlerInfo.InvokeHandler(Object target, RoutedEventArgs routedEventArgs)
 at System.Windows.EventRoute.InvokeHandlersImpl(Object source, RoutedEventArgs args, Boolean reRaised)
 at System.Windows.UIElement.RaiseEventImpl(DependencyObject sender, RoutedEventArgs args)
 at System.Windows.UIElement.RaiseTrustedEvent(RoutedEventArgs args)
 at System.Windows.Input.InputManager.ProcessStagingArea()
 at System.Windows.Input.InputManager.ProcessInput(InputEventArgs input)
 at System.Windows.Input.InputProviderSite.ReportInput(InputReport inputReport)
 at System.Windows.Interop.HwndMouseInputProvider.ReportInput(IntPtr hwnd, InputMode mode, Int32 timestamp, RawMouseActions actions, Int32 x, Int32 y, Int32 wheel)
 at System.Windows.Interop.HwndMouseInputProvider.FilterMessage(IntPtr hwnd, WindowMessage msg, IntPtr wParam, IntPtr lParam, Boolean& handled)
 at System.Windows.Interop.HwndSource.InputFilterMessage(IntPtr hwnd, Int32 msg, IntPtr wParam, IntPtr lParam, Boolean& handled)
 at MS.Win32.HwndWrapper.WndProc(IntPtr hwnd, Int32 msg, IntPtr wParam, IntPtr lParam, Boolean& handled)
 at MS.Win32.HwndSubclass.DispatcherCallbackOperation(Object o)
 at System.Windows.Threading.ExceptionWrapper.InternalRealCall(Delegate callback, Object args, Int32 numArgs)
 at System.Windows.Threading.ExceptionWrapper.TryCatchWhen(Object source, Delegate callback, Object args, Int32 numArgs, Delegate catchHandler)
 at System.Windows.Threading.Dispatcher.LegacyInvokeImpl(DispatcherPriority priority, TimeSpan timeout, Delegate method, Object args, Int32 numArgs)
 at MS.Win32.HwndSubclass.SubclassWndProc(IntPtr hwnd, Int32 msg, IntPtr wParam, IntPtr lParam)
 at MS.Win32.UnsafeNativeMethods.DispatchMessage(MSG& msg)
 at System.Windows.Threading.Dispatcher.PushFrameImpl(DispatcherFrame frame)
 at System.Windows.Application.RunDispatcher(Object ignore)
 at System.Windows.Application.RunInternal(Window window)
 at Microsoft.VirtualManager.Setup.Program.UiRun()
 at Microsoft.VirtualManager.Setup.Program.Main()

So what this means is that the setup is unsuccessfully trying to determine whether SCVMM is installed in a clustered setup. Which mine is not. Has never been.

The solution is to actually *install* the Windows Feature Failover Clustering. This way the check can run and setup will continue. There is no need to actually configure clustering.