- It’s been a busy year and some of the things I’ve been involved in warrant writing about. So here we go!
We’ve moved to a new home and it’s been quite a project. But let’s settle for the really important stuff: The new home network. ![]() Having bought into the building just early enough, we took the opportunity to adjust the wiring specifications just slightly from what was luckily already a pretty decent setup. There were plenty of electrical outlets, coax cable in every room and phone lines part of the plans. We only added a few electrical outlets so we would never have to run any power cables around corners (I hate cable clutter!) and then went to town on the data cabling:
Having bought into the building just early enough, we took the opportunity to adjust the wiring specifications just slightly from what was luckily already a pretty decent setup. There were plenty of electrical outlets, coax cable in every room and phone lines part of the plans. We only added a few electrical outlets so we would never have to run any power cables around corners (I hate cable clutter!) and then went to town on the data cabling:
I’m a big fan of speed. Especially where networks are concerned. So CAT6 Ethernet was the minimum requirement. While we’ll come to wi-fi later, nothing I’ve seen commercially available will beat a wired connection. So we put at least two RJ-45 sockets into every room.
 Not knowing where we’d put the TV on the wall, we set up two walls in the living room for easy placement. To me this means putting all the necessary outlets (Power, Cable TV and Ethernet) right up the wall so they are hidden behind the TV when that is mounted. This way all the cables just vanish from sight. As we don’t need two TVs in the living room, we have the second row of outlets hidden behind a picture frame.
If there is one thing I’ve learned from experience: There is no substitute for planning when it comes to setting up a network. Getting the physical layout and architecture right the first time will save you a lot of money, time and nerves in the long run. So I did not want to compromise when it came to my home setup.
 All CAT7 cables run into our storeroom. There they meet up with the coax TV cable which currently serves as our ISP line.
At the same location I also have the option to access the POTS wiring if I wanted to switch to xDSL. And there is a proper 19†network cabinet. I won’t call it a rack as it is only 9U – then again it fits all the equipment I’ll ever need it to host.

First of all, you’re looking at a Rittal FlatBox DK 7507.110. The enclosure is wall-mounted with just enough space for cleaning (basically making sure our Roomba will fit with no issues).
I use an EQUIP 333293 PDU with some cable modifications: I ran the power cable that enters the enclosure directly into the PDU, replacing the original power cable. At the same time I connected the grounding wires that connect all of the metal parts of the enclosure to the grounding wire that is part of the house electrical installation.
I use an EQUIP 326416 16 port CAT6 patch panel – I only need 12 Ports but I wasn’t able to find a 12 port 19†panel. All CAT6a panels I looked at were 24 ports and I preferred the centered 16 ports on this panel as I’m using small switches with ear extensions. Speaking of switches…
 We have two 10 port Cisco Small Business switches: One SG300-10 as well as an SG300-10PP for 802.3at POE+. I already had experience with the SG300 line of switches from multiple jobs and so far I can absolutely recommend them for any small business / edge switching / home lab use. They basically do everything you can ask of a switch right now up to and including Layer 3 routing. But most importantly, the SG300-10PP is the only rack-mountable switch I was able to find with POE+ that is fanless. It has a 60 Watt power budget which for my use cases is plenty.
Completing the network are my cable modem, a Ubiquity UniFi Security Gateway (USG) and a Ubiquity UniFi CloudKey. Then there is my trusty old Netgear ReadyNAS Pro Business – slightly modified with upgrades to the CPU, RAM and fans. The last part being essential: Replacing the stock fans with some Noctua fans was probably the best upgrade to that system.
I’m considering replacing the current NAS with a smaller 4-bay model in the future. My needs here are relatively simple: All I need is lots of storage along with support for SMB, DLNA and Wake-On-LAN. With progress in ARM based storage devices, I’m seriously thinking about taking the plunge just to get the power needs down. Cooling hasn’t been an issue so far but the room does warm noticeably when the door is closed – as was to be expected with it having virtually no ventilation whatsoever.
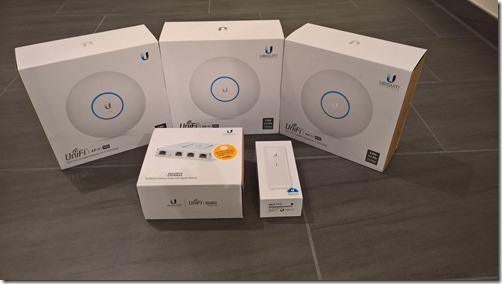
So on to the wireless setup: Having the best wife in the world, I was actually gifted a Ubiquity UniFi AP AC PRO for my last birthday, right off my Amazon wish list. Only there was a problem. Several actually:
– The dashboard is kind of addictive. The amount of information it can give you – without messing about with SNMP, MIB files etc. – is just amazing. I love solutions that just work.
– As with any entrance drug, UniFi really only works when you set up the whole shebang. So I picked up a USG security gateway to get insight into my network traffic on the WAN side.
– This being my place, any dead spots in coverage or drop-off in throughput could not be tolerated. So the single AP was soon joined by two of it’s brothers.
– I’ve come to appreciate single-use appliances. Things designed to do one thing, and one thing only. And do it well. So I’m running the UniFi controller on the purpose built UniFi CloudKey. I originally thought about using my Raspberry Pi but then remembered how much I actually hate caring and feeding a Linux system on a day-to-day basis.
What I ended up with was this:

So how did I set up the Wi-Fi? I’ve been using the UBNT community forum to read up on what works and best practices. Basically the logical network I’m running is rather simple: There is no point in using fancy things like management VLANs around my LAN and while I might set them up for the home lab, everything is just a flat class C private subnet (my provider hasn’t figured out yet how to give me an IPv6 prefix – I wager it’ll take them longer to get that done then it takes Chris Büchler (of pfSense fame and now working at Ubiquity on the Routing & Switching products) to implement IPv6 on the UniFi controller and USG router.
I currently have an open guest network using the UniFi controller to act as a HotSpot gateway using vouchers (Not happy with the open nature of this network, any help in setting up HotSpot 2.0 to get encryption for guests without having to hand out WPA-keys would be appreciated).
And this is how it looks:
 This is a view of the UniFi controller running on my home network.
Where things get tricky is the map view. This may help with planning the deployment of hotspots, you’ll see it’s always a good idea to check with reality:
") This is just the plain view of locations of the access points.
This is just the plain view of locations of the access points. 
What I want is good signal in all rooms as well as fast speeds in all locations that are commonly used by me.
All the UniFi AP AC Pro’s are wall-mounted.
Let’s take a small detour into the ABC’s of Wi-Fi networking:
2.4 GHz is for coverage. 
5 GHz is for speed.
There are only 3 non-overlapping 2.4 GHz channels (1, 6, 11) at 20 MHz channel width. At best this gives you 300 MBit/s linkspeed with a two antenna setup. As 2.4 GHz Wi-Fi will penetrate further, be a good neighbor and don’t use wider channels. Also it is a good idea to turn down the power of the AP so as not to cause interference where you don’t actually need you Wi-Fi coverage anymore.
At 5 GHz, *if* you can use DFS Channels, there are up to 4 non-overlapping channels of 80 MHz bandwidth each. This gives you up to 866 MBit/s linkspeed with two antennas. It is very rare to come across a Wi-Fi client with more than two antennas. Unless you only have drywall, you can forget about getting a useful signal more than one wall away.
There are plenty of rules of thumb about this but nothing beats actually measuring it!
")
Using the free tool Netspot, I made this coverage map of my apartment. In this screenshot I’m showing just the 2.4 GHz coverage. As you can see, the tool gives slightly different locations for the Access Points. It puts them where the signal is strongest – which depending on things like the signal bouncing off surfaces might be quite a bit off: See the bottom right AP which the measurements put right in front of the metal door to the elevator.
On ") the 5 GHz front things look a lot colder. As expected, there is only really a fast connection in the rooms where we actually put the APs. Then again we don’t really need the speed in our guest room.
the 5 GHz front things look a lot colder. As expected, there is only really a fast connection in the rooms where we actually put the APs. Then again we don’t really need the speed in our guest room.
So that’s it for this project. Please tell me what you think, any suggestions where I can improve or whatever else comes to mind!
-Jan